I have been so often in the need for quick graphical access to a server without the need of an actual mouse and display plus wiring for power and so on.
In the enterprise world there are things called 'KVM switches' and laptops which do exactly what i need but a) they are fucking expensive and b) they are stationary and built into server racks so i came up with my own low-budget solution.
With this you will be able to see video output from composite,hdmi and vga and control a virtual USB keyboard of a headless server or embedded system.
I am using a 32u4 turned into a software keyboard and a Composite Video grabber to capture the output of the system to supervise.
A fair Warning: Be aware that the video image is very crappy and the software keyboard code is a WIP.
2019 Parts Update
There are now new super cheap USB-HDMI-grabber from aliexpress which are essentially the composite->usb and the hdmi->composite part combined, buy these to avoid lots of the extra cables. The Quality will still be AV but for most stuff it is good enough.
Parts list
All you need are the following things:
For the soft keyboard input:
- a 32u4 microcontroller like the arduino pro micro (amazon US)
- a cheap USB-TTL adapter (amazon US)(aliexpress)
For capturing video:
- a video grabber with the STK1160 chipset (for linux support) I asked the sellers on aliexpress and found this videograbber which uses the chipset needed. EDIT: it seems they are sold at amazon a similar grabber (amazon US) with the right chipset. It is twice the price but it is in your inbox in 2 days.
- a HDMI-to-AV (amazon US) (aliexpress) and optionally a VGA-to-HDMI (amazon US) (aliexpress) box to capture output other than the one from a Raspberry Pi which has native composite output.
Setup
Soft Keyboard
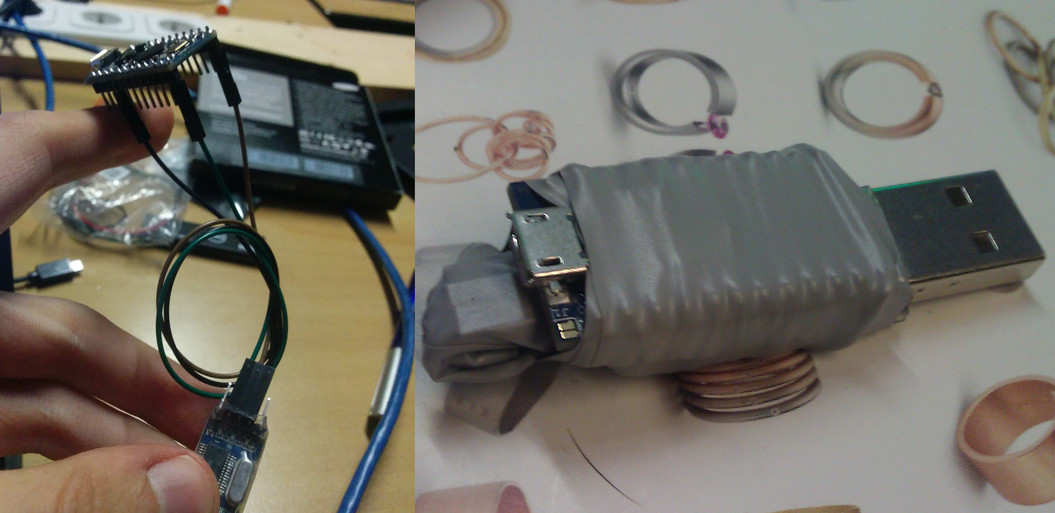
Attach the USB-TTL adapter to the 32u4 by connecting both GND , Pin 9 to the USB-TTL TX and pin 10 to USB-TTL RX.
You can either plug it together with jumper wires or do a real cabeling from the beginning:
Now it is time flash the passthrough firmware for the 32u4:
git clone https://github.com/makefu/keyboard-passthrough.git
cd keyboard-passthrough
cat README.md
arduino key_passthrough/key_passthrough.ino
# flash it
Get the passthrough software running on your computer:
pip install hg+http://bitbucket.org/pygame/pygame
python here.py
Video Grabbing
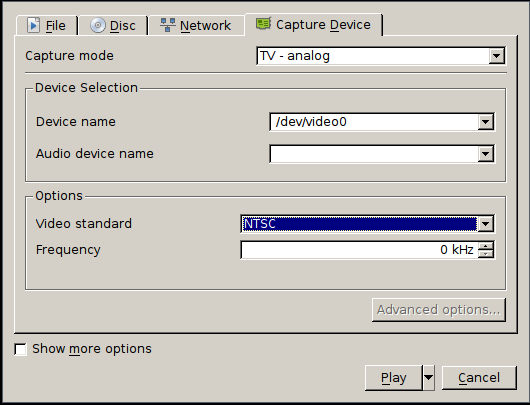
The video capturing is very straight forward, attach the videograbber to the fitting hole on the HDMI-to-Composite to capture HDMI video. Put the switch to NTSC for best performance.
Optionally attach the vga-to-hdmi box to the hdmi-to-composite box to capture VGA video.
On your computer, open VLC and configure it to start the NTSC video stream:
By the Powers Combined...
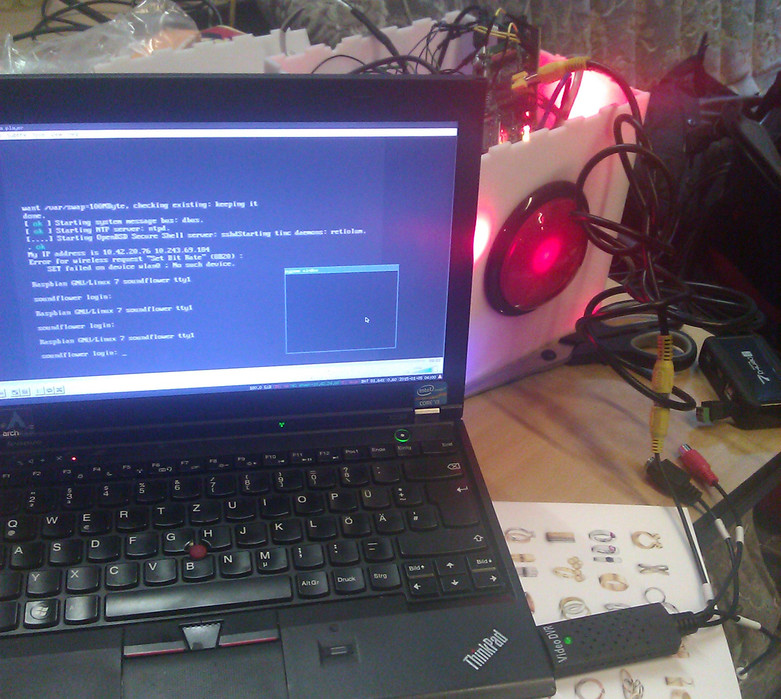
To make some real use of it, first start the here.py and then vlc. The black window will stay in foreground and you can write into while you can see the video of the device. And there you have it, your own low-budged software KVM you can actually carry around.
Conclusion
This is the first prototype:
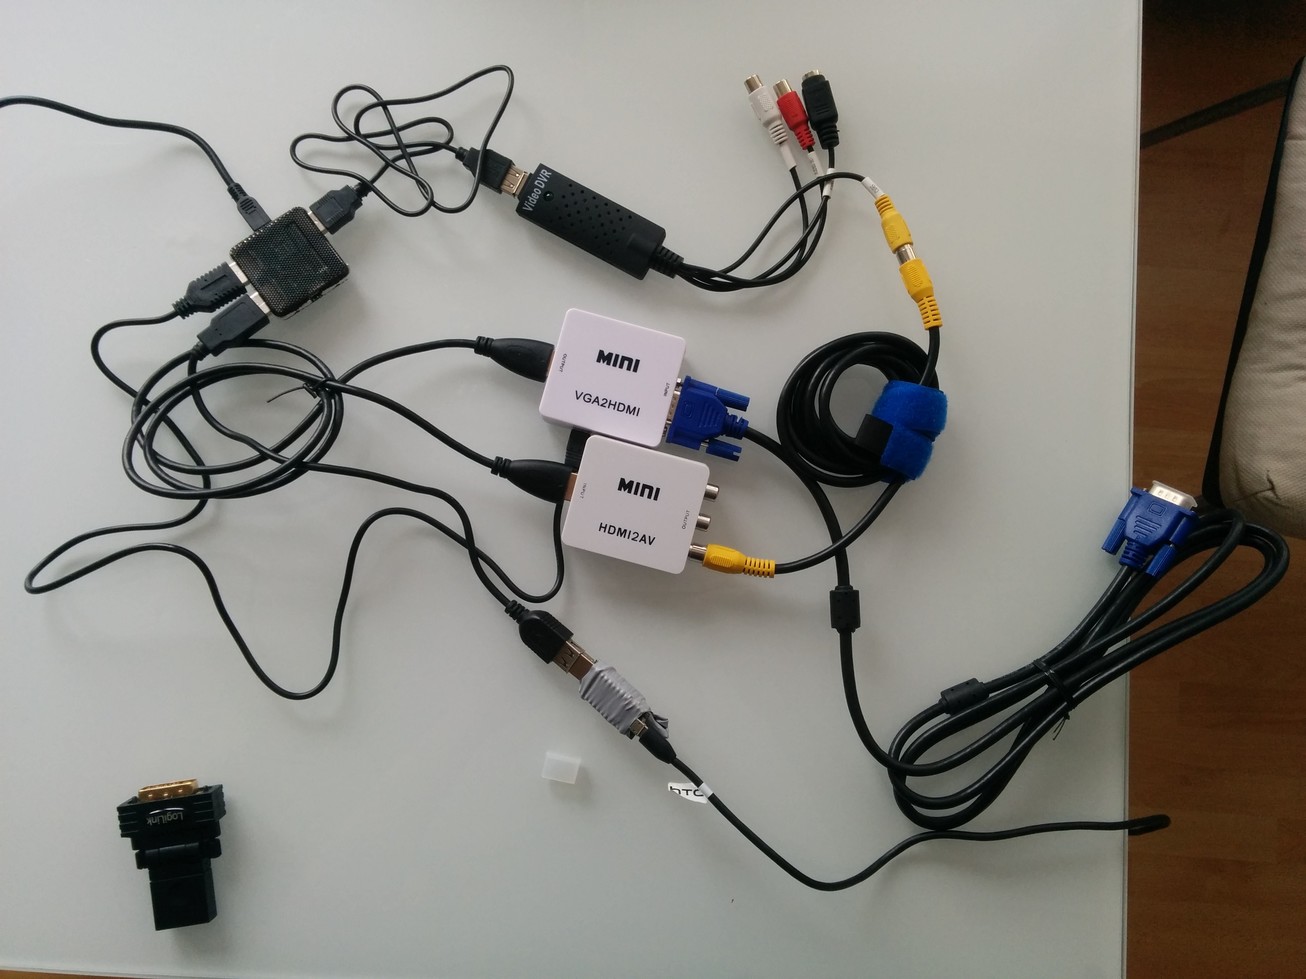
When you put everything on a table it sure is a huge mess, the next step for me is to put it in a nice package and be happy with it. In the end there is only one usb-cable going to the controlling computer and one USB and Monitor cable going to the computer to be controlled.
If you are looking for something more polished you can have a look at the Atrix Lapdock (amazon US). I got mine really cheap in clearance sale (60€) maybe you are lucky too.
You will need a microHDMI-to-HDMI Adapter and USB-female-to-USB-Male cable. Once the adapters have arrived i will try to mod it into a Hardware KVM you can carry around.
Comments